A recent conversation with a SkinTrack follower on Twitter prompted me to write this DIY/How To article. Over the years, I have owned couple of skimo racing and ski touring packs so I have a good experience with what works and what doesn’t (meaning, it works less than I would like). So let’s go.
Two good systems for fast ski attachment
In the last 10 years or so, two systems were developed allowing skimo racers to attach their skis to their backpacks without ever taking their pack off.
The first one, before ISMF rules allowed the hook system, was very secure and quickly became popular. It worked like this:
- You took off your skis and put them together.
- Then holding them both in one hand, you put the tails of your skis through a loop (flat webbing/sling) on the bottom right or left side of the pack.
- You slid them down until the heel bindings stopped the skis in place.
- You pulled the skis closer to your neck with one hand and wrapped a strong bungee cord around them once.
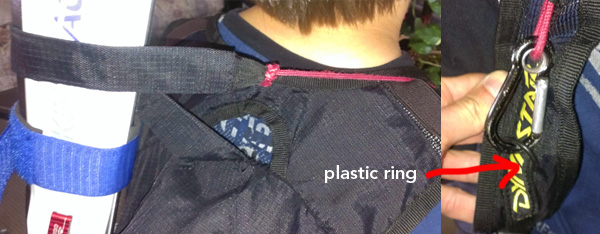
- Then you clipped a carabiner at the end of that cord to a plastic or a metal ring that was about half-way down one of your shoulder straps (always the opposite strap to the side where the bottom loop was).
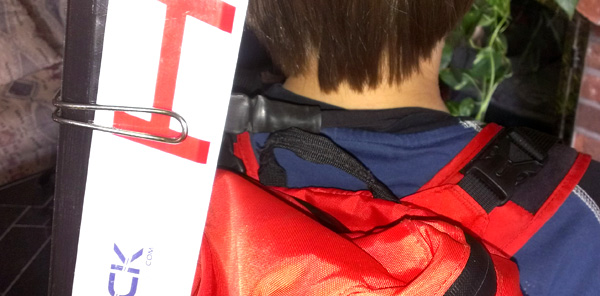
The second system, being widely used now, is the ski hook system. It is not as secure as the first one but it’s very fast. It works the same way like the above until step #4 at which point you just hook a metal hook that is attached to a strong bungee around your skis and you are done. No wrapping or clipping.
Here are photos showing the difference between the two systems:
Making a ski hook system
Since the ski hook system is the more popular one let’s take a look at how you can make one for your pack. Or how you can make a new better hook if you don’t like your current one.
Bottom-side loop
A basic requirement that both above systems have in common is that you need a loop on one of the sides at the bottom of your pack. Depending on a pack you have this might be easier or more difficult to setup but at the end it should look like this:
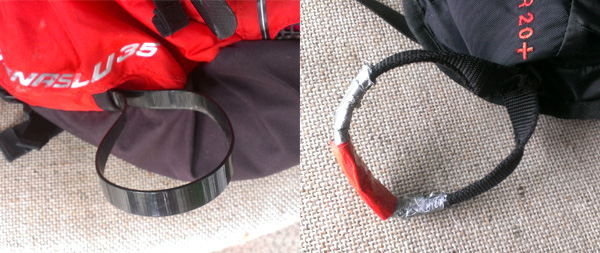
The material I recommend to use for the loop is webbing or an old sling, then wrap it in some duct-tape to make it more rigid (Gorilla tape is the most durable).
Manufacturing the ski hook
Ski hook is not a ski hook – some work great while others not well enough. So what makes a hook work well?
I discovered that if the ski hook is made from a strong, flat piece of material (2 cm wide is enough) then it works the best. And, of course, the dimensions and the way it is bend play big roles too.
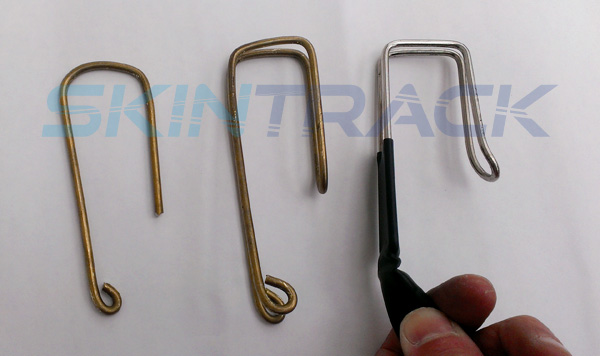
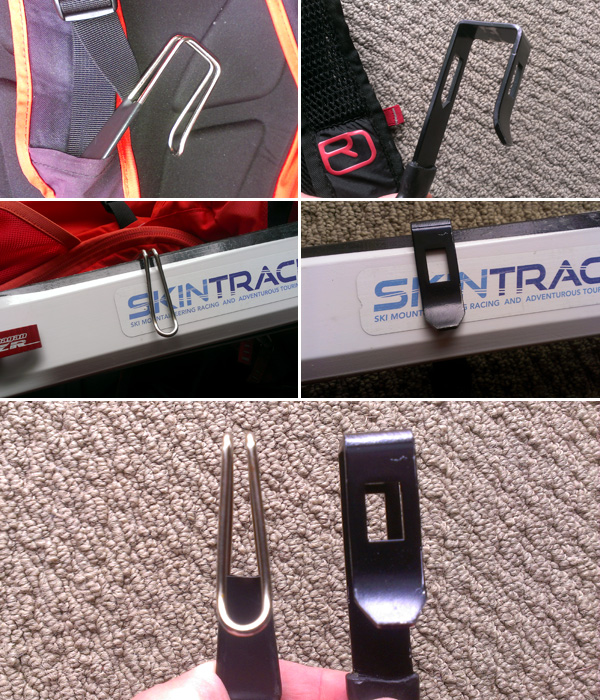
Without reinventing the wheel I took my two favourite packs and took a closer look at their hooks – the way they are shaped and the dimensions they have. Surprisingly, they are very similar despite the metal pieces they are made of are totally different.
Here is how they compare:
This is what you need (or what I used):
- 40 cm long piece of 1/8″ (3.15 mm) thick, easy to work with yet very strong metal rod (or wire with similar properties and diameter), preferably one that will not rust.
I bought something labeled as “solid brass” which appeared easy enough to shape and apparently doesn’t rust. - Then you will need lineman’s or combination pliers,
- and vice could be useful as well.
Here’s the process:
Step 1 – Dimensions
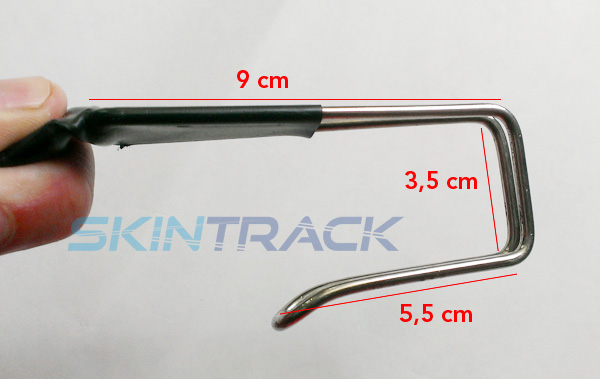
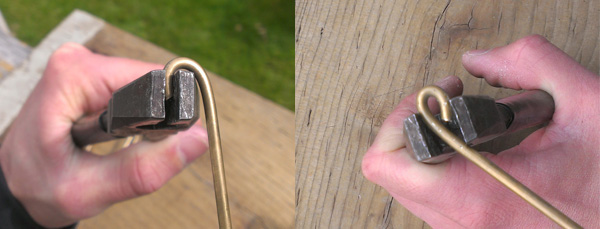
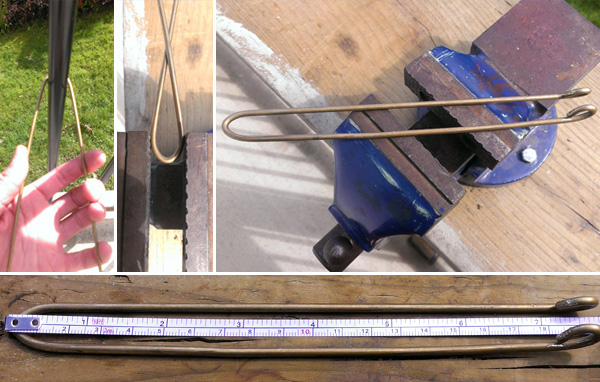
Step 5 – To finish off, bend the 9 cm part to 90 degrees which will leave you with about 3,5 cm piece in the middle.
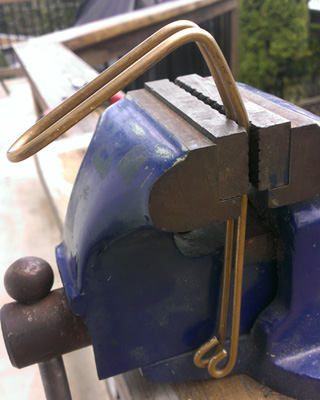

I believe the secret of a good ski hook is in 4 things:
- Making the 90 degree bends as tight/sharp as possible,
- keeping everything else as straight as possible,
- making the parallel parts long enough (not obsessing about extra weight),
- and making it either a double rod hook or from a flat material.
I ultimately don’t know why single rod hooks don’t work as well but it is either due to one of the following reasons or a combination of them. On some backpacks the hooks are:
- either too short,
- or the 2 bends are more like a one big curve,
- or simply a single rod doesn’t have enough side leverage to hold the skis in place sufficiently.
Attaching bungee cord to the hook
I couldn’t find a strong/thick enough bungee at home so I used a thinner one I use for making skin attachments. (Working on that How To tutorial as well.) However, if you are just replacing your existing hook you will have some cord to work with.
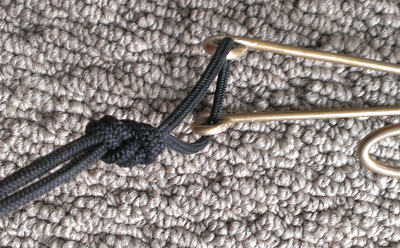
Attaching bungee to your pack
You will need to do this if you are building a brand new carrying system on a pack, and you should not need to if you are just replacing a bad hook.
If you are building a brand new ski hook system then depending on what kind of straps, plastic or metal pieces your backpack has on its shoulder straps this will be easy or more difficult.
Important – remember to attach your cord with a hook to the opposite shoulder strap than on what side you placed your bottom-side loop. And use a strong bungee.
On the photo below, I am pretending the pack has clean, smooth shoulder straps so I am just attaching the bungee to the top of the strap to prevent it from moving once under load. It would be desirable to attach it further down the shoulder strap if you can figure out how to secure it there. Duct-tape? 🙂
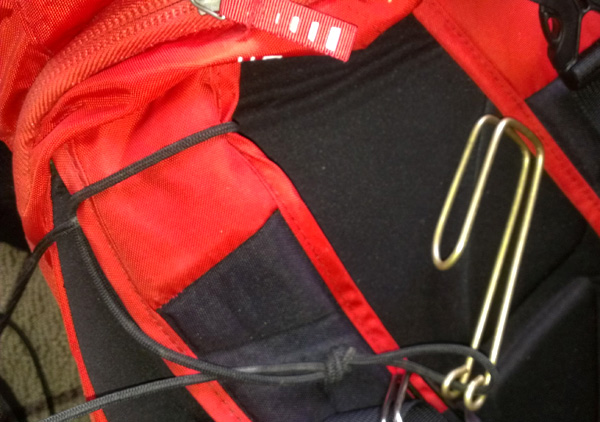
Ultimately, to figure out the right length of the bungee you will need to play around a bit. My suggestion is to start with a bungee or an elastic not longer than 10-15 cm when stretched.
That should be all you need to know on how to make your own ski hook.


Malcolm Taylor says
I just finished making a version of this for my BCA float bag. It still has it’s main ski attachment system, but I added a hook and beefed up the loop a bit to speed up setup for short bootpacks. The Float seems like it was made for this, there is a zip up pocket type thing on the shoulder strap so you can swap sides with the ripcord, that holds a hook very nicely. There is even a anchor inside the pocket!
Stano Faban says
Kevin, I apologize for not seeing this comment sooner and answering.
That is a good question since I forgot to show where the hook goes on a pack that comes with a ski hook. Then a similar “storage room” can be made. Packs with hooks have small pouch on of the shoulder straps where you slide in the hook when you are done with carrying your skis.
kevin says
What do you do with the hook when it’s not in use? Is there a way to stow it or make it retractable?
Alex says
Thanks for these instructions! They saved me lots of time on backcountry transitions.